So now you know how to take a rolling shot… Let’s learn how to just fake one completely!
It’s been almost a year since I’ve posted up my rendition on “how to take a rolling shot” and since I’ve posted it, it’s been my top post every single day since then, and even today. To date, it’s got 5,596 hits and I think that’s pretty helpful if even 10% of those hits got something out of it. Here it is again if you want to reference it: How To: Take Rolling Shots. Ever since it got so much attention, I’ve been wanting to share some other tips and/or tricks that might help but to be honest, I don’t have many tricks up my sleeve. I like to shoot so that I don’t have to do a lot of “fixing” but I do want to try and learn new techniques to help me get better. Sometimes being able to visually manipulate a photo can make it more interesting to look at, or give it that “wow” factor.
One thing that I’ve used once or twice (literally) out of necessity is rendering a shot of a car to make it look like it’s rolling. It works great if you have a rolling shot and didn’t get enough wheel spin or background blur as well. For illustrative purposes, I’ll use a “less than ideal” photo just to demonstrate the techniques better and in the easiest way I can. Once you practice with this technique, it becomes easier to translate them over to other types of photos.
I’m working with Adobe Photoshop CS5.1 only – I don’t work in any other program because I find that CS5 does exactly what I need it to do. I’ve tried working within Lightroom but it personally wasn’t for me. These techniques are fairly simple and if you’re comfortable in photoshop, you’ll be able to get this in one shot.
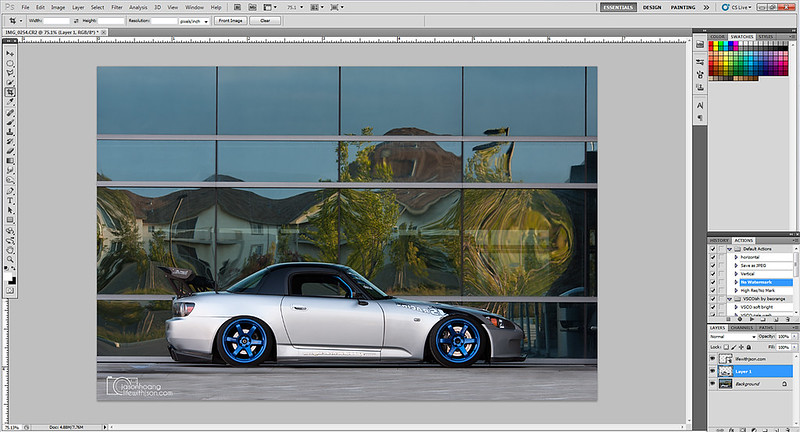
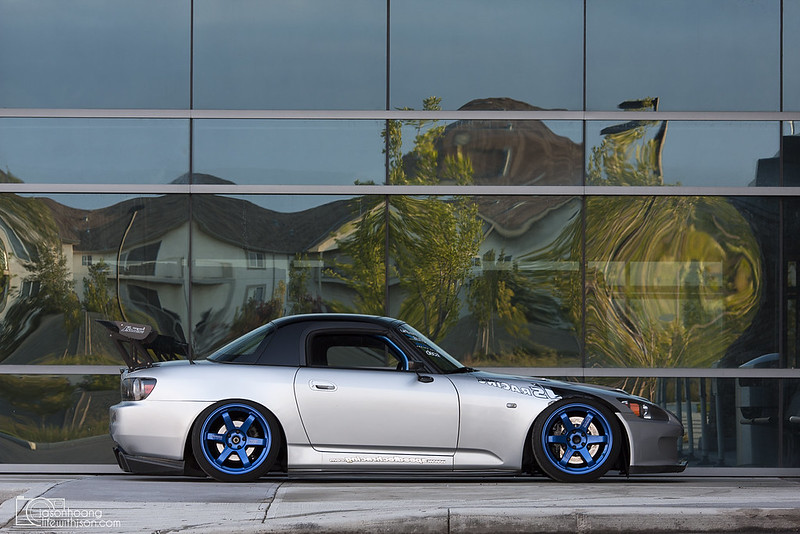 Here is the original shot that we’ll work with. It’s stationary, exactly parallel with the camera and the background is fairly simple to work with.
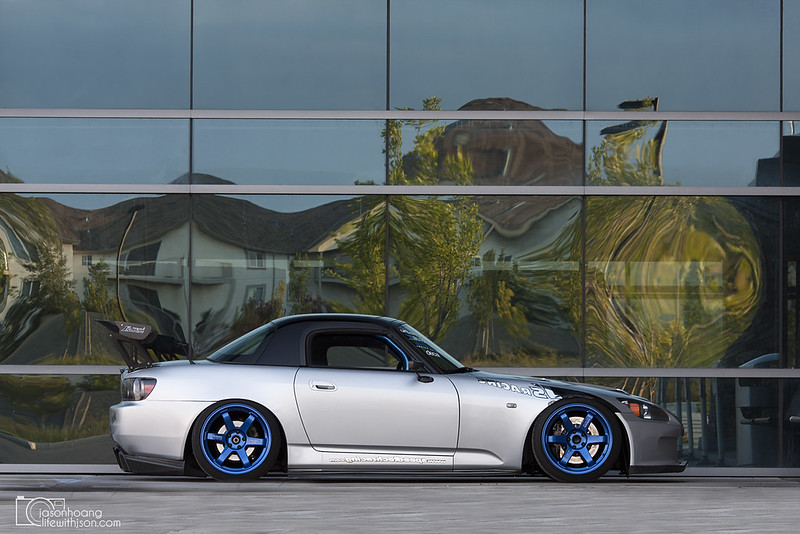 The next thing I did to simplify things is I just cloned out the ground a bit to make it simple. The curb kind of made it look weird and uneven so I wanted to take it off.
Notice that I didn’t spend much time on it because it won’t matter much in the later steps. Just make it look clean and do it to the rest of the background if you feel it’s needed.
 The next thing you want to do is select the car only. There are a few ways to do this. You can use the polygonal lasso tool, the magnetic selection tool, or you can just highlight around the car to get the most accurate selection. You’ll find yourself with a headache after a few tries with either of the first two options, so I highly suggest the latter route…
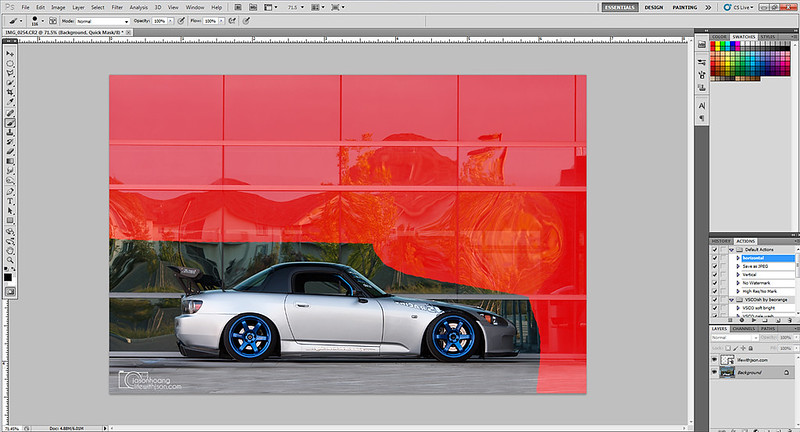
Simply press “Q” on your keyboard and select the brush. This puts you in quick mask mode. When you start “painting” on the picture, it should start painting a translucent, neon pink/red on your picture. This is what you want. You can adjust your brush size as you get closer to the car to get as close as you need. This gets down to 1 pixel so if you need to get into tight spots (between wing stands, wheel wells, bumpers, etc). The best thing is if you accidentally “paint” over a part of the car, simply press “X” and paint over the area you need to correct. This will get rid of the pink/red selection.
 Take your time as you get closer to the car… The more time you spend selecting around the car properly, the better results you’ll get at the end. Here is a shot of the full background selected around the car. You’ll notice that as you start to do this, you might want to leave more of the car’s shadow as part of the “unpainted” part so that it doesn’t look disconnected in your final image.
In this example, I painted over the shadow so you could see what it looks like when that happens…
 When you are happy with your selection, press “Q” again and it should select the car – your marker will outline the car.
 Simply copy (CTRL +C) and then paste (CTRL +V) right after. What that does is it allows you to separate the car from the background for use later. The image should look exactly the same – the only thing that you’ll notice is that you’ll now have an extra layer in your layer window. (Bottom right window on my screen).
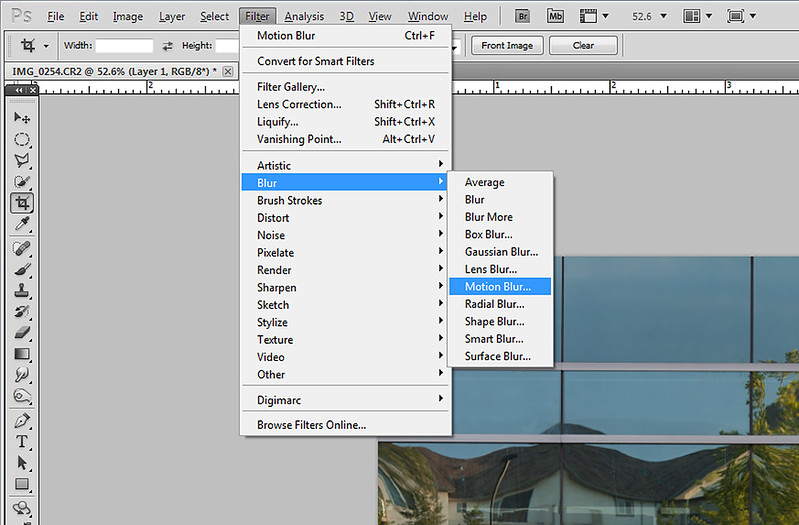 The next step is to simulate the background movement. In your layer window, select the “Background” layer or your original layer if it’s not called “Background” and navigate to your filter menu. Filter > Blur > Motion Blur.
 Selecting that will bring up an option window. In this window, you have the option to adjust the angle and the distance. The angle should always match the direction that the car is moving or the direction you want the viewer to “feel”. The distance is totally subjective – it should look like it’s blurred enough. Not too much or else it’ll look fake, but not too little or it won’t do much in terms of creating a sense of movement.
In this example, my angle is “0” and my distance is “250”. It’ll simulate what it looks like as you play with it. Once you’re happy with what you have, click “OK”.
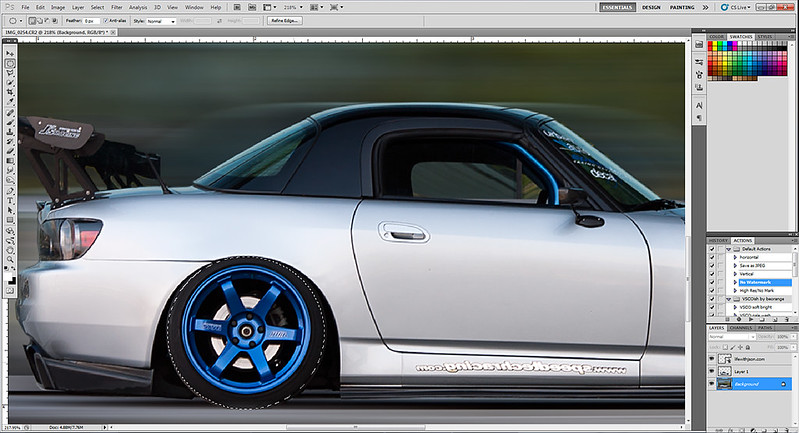 The next step is to make the wheels look like they’re spinning. This particular step is important because that’s what makes a rolling shot look so good. This step can also be used in real rolling shots where you need MORE wheel spin.
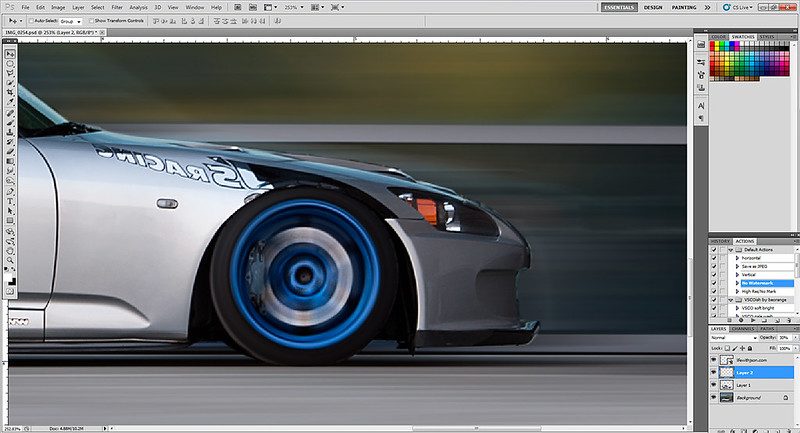
What you wanna do is select your elliptical marquee tool to select the wheel AND tire. It’s important that you don’t forget the tire – lots of people only select the wheel and think that the tire doesn’t spin either. We need to create the full effect as best we can. In this image, you can see everything I can select of the wheel and tire is selected.
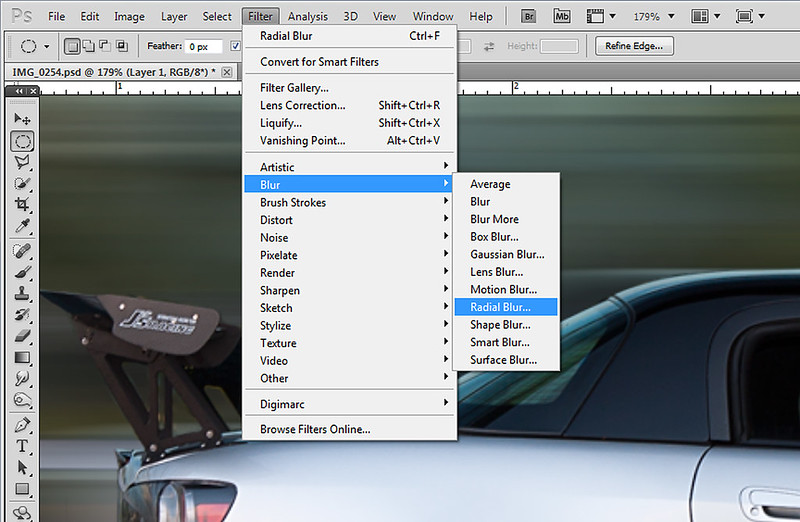 Navigate up to your filter menu again. Filter > Blur > Radial Blur.
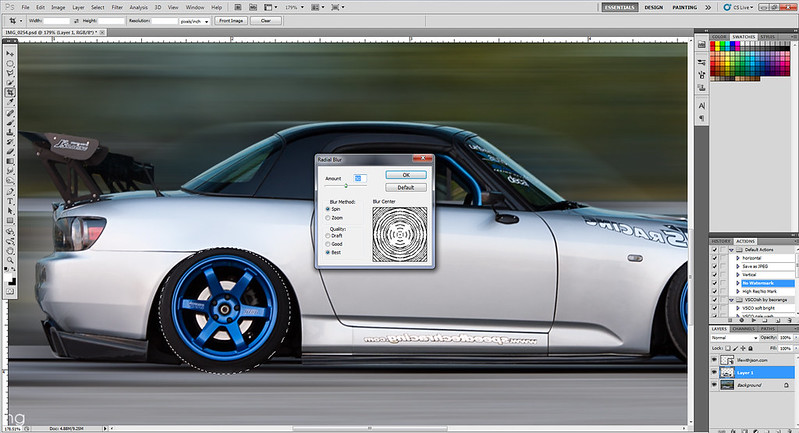 The radial blur does exactly what it’s named. It creates a radiused blur around your selection. You want to choose “Spin” and “Best” usually. The blur center in this case should remain as default – that is centered. This works because the car is exactly parallel to the camera.
However, if the car was angled or off center, then you would have to adjust the blur center accordingly.
Do this for both wheels.
 OK! We are almost there – we have the background moving, we have the wheels moving and it’s looking good! Just a few more things to make it look a little better…
1) The T1R big brake kit is no longer visible.
2) There is a ghost image from the blur that was created.
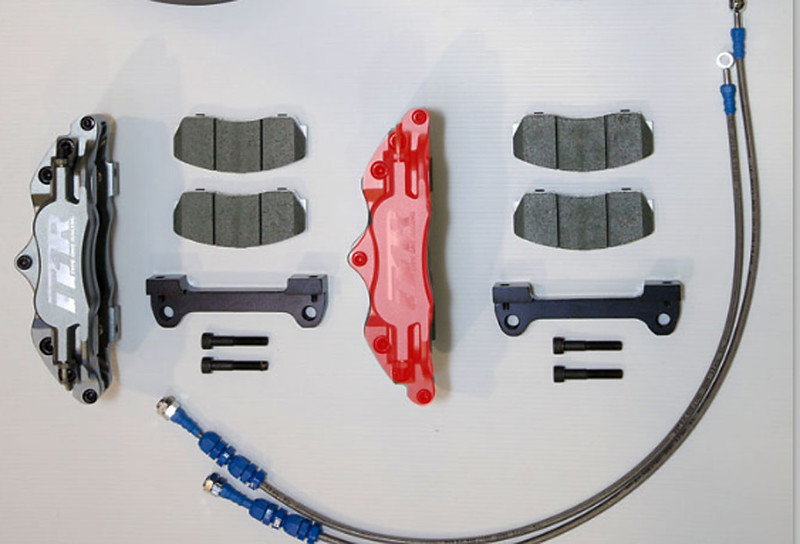 For Jackie’s car, I know he has a big brake kit and I know it’s T1R so it was easy for me to find. When you use radial blur, it doesn’t retain the original details behind the wheel like you would see in a real rolling shot. So, just to try and retain the “realistic” feeling, we’ll put the BBK in there.
I found this image and I used the same quick mask method as I did above. However, when you press “Q” when you’re complete, you need to invert the selection so that you select only the brake and not the other stuff you don’t want. Just go Select > Inverse.
After I selected, I copied it and pasted it on to the image.
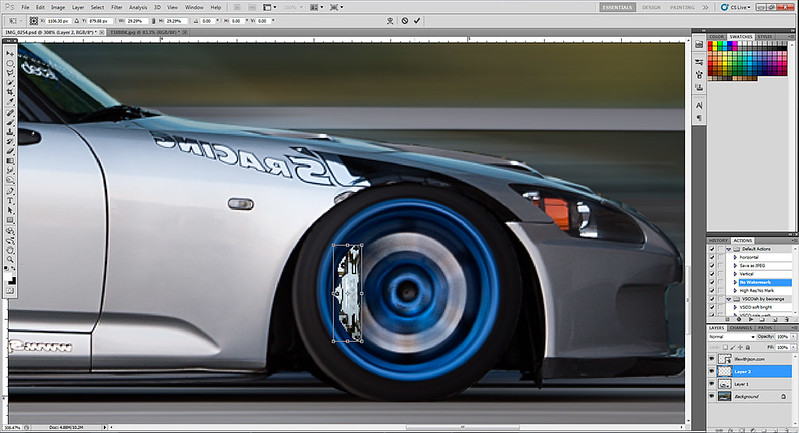 Once you paste it, you need to go Edit > Free Transform so that you can adjust the size of the caliper to match the original brake as close as you can. Just position it where it needs to be.
 This is what it should look like. So far so good.
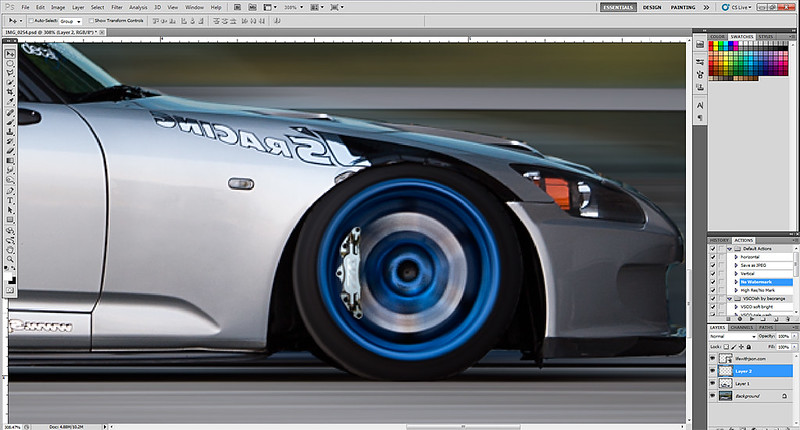
 The next step is another important step because we don’t want to just have the brake sit on top of the wheel, we need to make it look like it sits BEHIND the wheel now.
To do this, simply play with the opacity in the layer window… This will differ every time because lighting will be different. I also adjusted the brightness and contrast to get it a little darker to make it look like it was “shaded”. The process is the same every time, but the values (opacity, brightness, levels, contrast) will almost always be different in each situation depending on the lighting of your original shot.
 The next step is to get rid of the ghost car image that you see behind and in front of the car from when we used the motion blur. Again, not something you typically see in a real rolling shot, so let’s try our best to get rid of it.
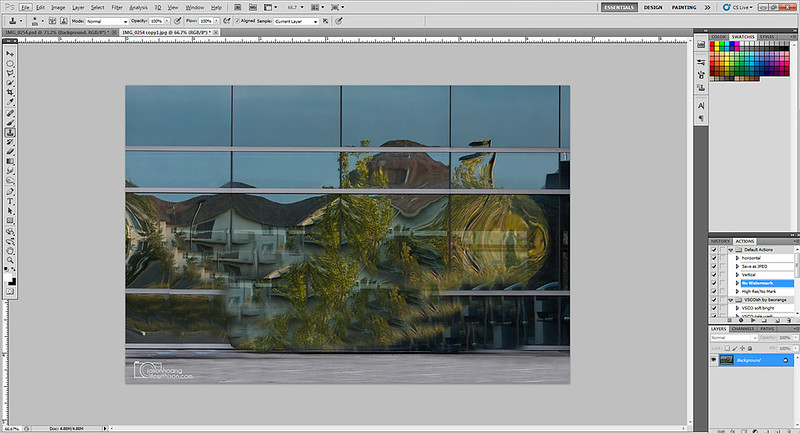
What I did was I opened up the original image in a separate window and I just cloned the car out. Again, notice that I did not spend a lot of time making sure it was perfect or ensuring that lines lined up or anything. All we need to do is get the car out of the shot.
Once you’re happy with your result, simply apply the motion blur effect again – the same values you used earlier should still be there. All you need to do is click “OK”.
Now once the image is motion blurred, just take your rectangle marquee selection tool and select the full background. Once you select it, copy and paste it as a new layer into your original working file.
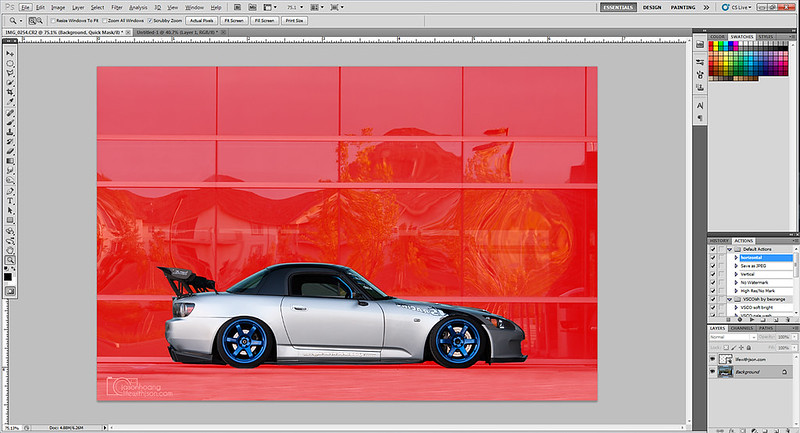
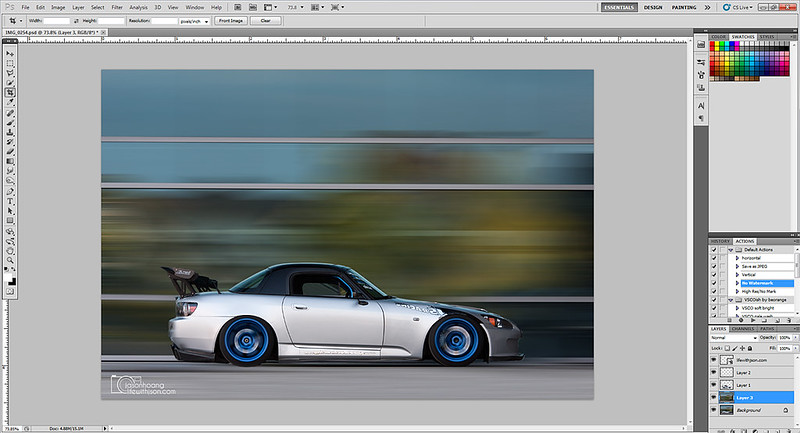 Once you paste it, it’ll paste as the top layer. You’ll need to drag and drop it down so that it’s the second last layer/on top of your “Background” layer in your layers window. You can see that in my screenshot above. You can see now that the ghost car image is no longer there! Voila!
There are a few things with this image that I wanted to illustrate though…
1) Because I did not select the shadow, it looks like the car is floating on nothing on the rear tire. This is why your selection step is crucial. You want to select everything you need for the later steps. The key is to think about how you want the end image to look like and do your pre-work accordingly.
2) This image had a background that was very close to the car and had quite a bit of detail in it. The closer the background is to the car, the harder it is to make it look more realistic. One exception to this is if your background is one or two simple colors – like a simple grey wall or a non-reflective surface. If the background had been a farm with a bunch of houses, etc it makes it more difficult to look realistic until you get really good with different techniques.
3) I did a quick job on the selection to show what happens when you don’t slow down and zoom in to carefully select. It looks like the car has been cut out and placed in the shot. That’s the last thing you want because you want to create the most realistic effect you can – your selection process will determine this.
4) No driver – so it takes away from the fact that it should look real. Had a person been sitting in there, it would’ve made it a little more believable. It’s best to work with an angle that is slightly off centered so that some of the harder details to hide aren’t so bad.
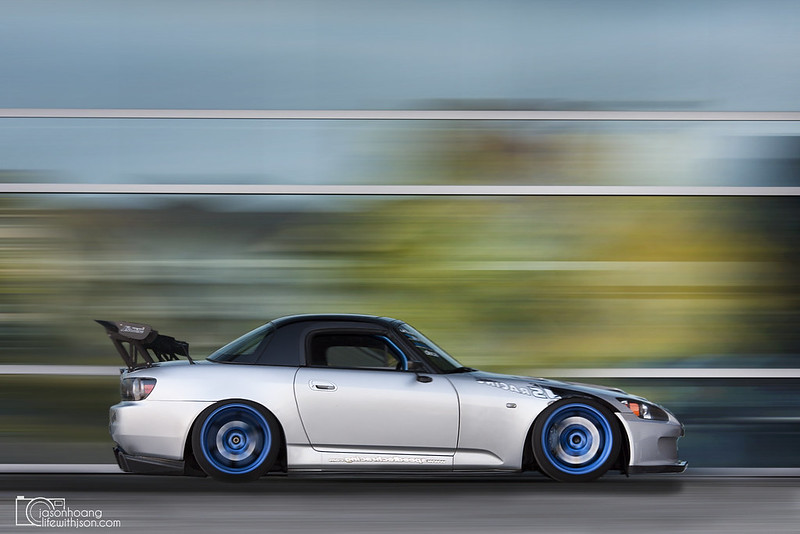 The final output image – I had to do some post processing to make it look a little more presentable. I tried to manually add in the shadow especially near the rear wheel. I blurred the car around the edges a bit to “hide” a little of the separation but you can easily see the separation the most at the front bumper. Overall, it helps to demonstrate the techniques properly for you to translate into your own images.
The best thing about this is that you can make a pretty standard picture look a little bit more exciting with some effort on your end.

Great post! Any chance you can do the same with Lightroom?
Thank you! Unfortunately, I wouldn’t even know where to start with Lightroom. The last time I even worked in Lightroom was probably about 6 years ago!
Awesome guide man, I’m not a photographer nor do I edit photos but I enjoy seeing the “behind the scenes” aspect of things, such as editing photos. Love the site too! Long time visitor, but I never post comments lol
Thanks man! Yeah, a lot of the time you don’t get to see how things get to where they are. I enjoy sharing so I don’t mind…
Appreciate that you’ve been around for a while! Thank you!
Haha…looks real..nice sharing on rolling shots Jason..